Super Simple Men's Sock Pattern

These instructions are the way that I think of them, so, as someone discovering toe-up and short-row heels, experts should feel free to skip some of the details.
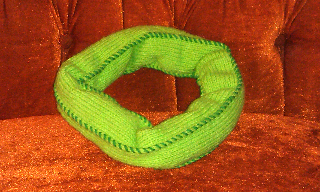
For yarn, I used yarn that I salvaged from an old sweater that had run into the end of its life. Lots and lots of yarn from that puppy! But I liked the color, figured lots of it still had good life left in it. It's green! (It's also cheap)
I also was eager to take advantage of some techniques in my new copy of Stitch 'n Bitch: Superstar Knitting (a Christmas present to myself). So, that's a good place to look up any details of techniques described in this pattern.
Gear up: (I used the following for this project)
5 double-pointed needles, US size 4
1 stitch holder for idle stitches
1 circular needle, US size 4
1 double-pointed needle, US size 8
1 yarn needle (for weaving in the ends)
Lots of yarn. Since mine didn't come from a traditional source, it's harder to say what the weight is, but for me it's pretty thin - thinner than regular sock yarn. It was also single twist, and for strength and gauge, I decided to double up and use 2 strands the whole way. I added in a third for additional strength on the heel, so that I don't have to darn quite as much later.
Key:
dpns - double-pointed needles
K - Knit
P - Purl
M1R - make one stitch right-leaning (Insert left needle point, from back to front, under the horizontal bar joining the last stitch on the right needle to the first stitch on the left needle. Knit through the front loop.) [Source Description]M1L - make one increase which slants to the left (Insert left needle point, from front to back, under the horizontal bar joining the last stitch on the right needle to the first stitch on the left needle. Knit though the back loop.) [Source Description]
w&t: wrap and turn

- Using Turkish cast-on, cast on 22 stitches (11 on each side)
- Row A: Knit 1 round
- Row B: K1, M1R knit to last stitch on that needle, M1L, K1; repeat on the other needle (makes 4 increases on single round all totaled)
- Repeat Rows A & B until there are 62 stitches (10 increase rows, should be 20 rows all totaled)
- Knit around until it reaches the start of the heel when tried on the owner's foot (on my model, that means 7 1/4" from the tip of the toe).
- Time to start the short-row heel:
- Set one side of stitches (either the top or bottom) aside on a stitch holder, scrap yarn, spare circular, etc. These will be the front of your ankle once it's all said and done.
- I used a circular rather than my regular dpns for this part, since it's easier for me to set down and pick up during and after commutes (great time to get a solid 45 minutes of knitting while on my regular bus).
- At this point, I also pulled in another strand of the yarn so that I was now working with 3 strands for the heel. It doesn't need to be knotted or tied in, simply pick it up and hold it along with the others. It'll have a tail that you can weave in later, but it's pretty simple.
- K to last stitch, w&t around this last stitch
- P to last stitch, w&t around this last stitch
- Row C: K to last stitch before previous w&t, then w&t around this previously active stitch
- Row D: P to last stitch before previous w&t, then w&t around this previously active stitch
- Repeat Rows C & D until there are only 11 active stitches remaining (numbers work well given the width of the toe)
- Row E: K through to last active stitch and pick up next stitch with its wrap, K1, w&t around next (idle) stitch
- Row F: P through to last active stitch & pick up next stitch with its wrap, P1, w&t around next (idle) stitch
- Repeat Rows E & F until all stitches are now active. When I did it, this ended with a purl row (wrong side), so I opened my stitch holder for one more stitch to use for a w&t so that I could get back on the proper side. Could also be achieved by leaving last purl row alone, and picking up that last wrap on the return side of the row around... but that's not how I did it this time.
- Cut off additional strand, so that it's just 2 strands again.
- K around 11 rows
- Row Set G: K2, P2 around (This will end with 2 sets of K2 next to each other... eh, whatever, no one is perfect. I only did this because I got so damned bored of just stockinette.) Repeat 4 times.
- Row Set H: P2, K2 around (Again, this will end with 2 sets of P2 next to each other, just go with it!). Repeat 4 times.
- Repeat Row Sets G & H 3 times for a nice, sturdy cuff.
- Introducing the size 8 needle, use a chain bind-off. The larger needle will make the bind-off sufficiently loose so those feet can get into the socks.
- Weave in ends, block if desired, and warm up those cold toes!


Comments
Post a Comment