Fluffy hat for a fun gift

This pattern is for a fun, festive hat made with a couple different types of yarn that create very different effects. It's simple enough, though the changes between needle sizes and weights of yarn can be a bit of exercise for your fingers. Depending on how Kaiser Wilhelm-y you want it to be, you can do the tassel or leave it off.
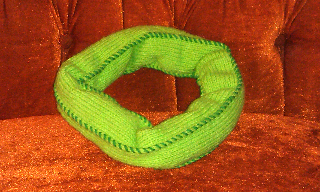
So, my mother asked for a hat for Christmas and sent me the following picture as a guide for what I should make for her, but she wanted it in red:

2 difficulties with this: 1 - local yarn shop didn't have any eyelash yarn and no access to big box craft shops that would carry it, 2 - I've never intentionally felted anything and the whole process scares me more than it should scare any rational, experienced knitter.
When I went to my LYS (Looped), I was able to find some awesome substitutes, and figured I could just do the top knitted in something lovely and cozy. I found 2 yarns that were perfect. For the top portion, I found Manos Maxima, extrafine merino wool in Fire and Himalaya Yarns recycled silk ribbons (my skein didn't have a tag on it, so don't know if there was a name to the color, but it was lots of warm orange, red, and gold that worked well with the Manos). The silk was strands of cut up recycled sari fabric, so where the edges frayed, it did get some of the eyelash idea going.
I tried this a couple ways, it took some experimenting to figure out how to get these two things to play along, since they were so different. When I did some gauge swatches, I round that the silk by itself was just not giving the right feeling of soft and warm. When I knitted it again using both the silk and the merino at the same time, it was perfect. The wool added the softness (this Manos stuff is like BUTTAH) and gave it a more appealing stretch. I also discovered that if I cast on using the needles I would use for the brim, it was WAY too tight. And the switch from the brim to the top had to be re-thought.
I also just recently got myself a Boye interchangeable circulars set that I found for $30 on Amazon while doing some Christmas shopping.
So here is what I used:
US size 15 needles for casting on
US size 10.5 circular needles with 12" of cable
US size 6 circular needles with 12" of cable
yarn needle
stitch marker
- CO 62 stitches on size 15 (I used slingshot cast-on), carrying both the silk and the merino yarns at the same time.
- Transfer to 10.5 circular needles
- Join the round and place stitch marker
- Knit 1 round
- Purl 1 round
- Alternate knit and purl rows until brim about 2 inches
- At next run in with the stitch marker, cut silk yarn and leave yourself with about 6-8 inches to spare and let it hang loose. You'll only be using the merino from here.
- For next round, knit into both front and back of each stitch (this will compensate for the difference in size between the stitches for the brim and the rest.

- Knit around until piece measures 2-3 inches from the brim (depending on the size of the recipient's head)
- Starting the decreases, at next run in with the stitch marker, begin the decrease row:
- 1st decrease round - K4, k2tog, repeat to last 5 stitches, K3, k2tog
- Knit around 3 rows
- 2nd decrease round - K3, k2tog, repeat to last 4 stitches, K2, k2tog
- Knit around 3 rows
- 3rd decrease round - K2, k2tog, repeat to last 3 stitches, K1, k2tog
- Knit 2 rows
- 4th decrease round - K1, k2tog, repeat to last 2, K2
- Knit 2 rows
- 5th decrease round - K2, k2tog, repeat to end
- Knit 2 rows
- 6th decrease round - K1, k2tog, repeat to end
- Knit 1 row
- 7th decrease round - k2tog around
- Knit 2 rows and cut off yarn with about 8 inches to spare. Bring yarn through stitches (instead of binding off) and knot end around yarn that started going into stitches. Pull yarn through to inside of hat to hide.

- Making the Tassel
- Pull a length of the silk yarn about 2 yards and cut it off.
- Using a yarn needle, thread one end, and bring through top stitches of the hat, leaving a 6 inch tail.
- Loop yarn around 3 fingers (to provide something like a consistent loop size), repeat several times until you have a reasonable number of loops or until there isn't any more space to pull the loops through.
- If there is additional length, don't worry, just let it hang for now.
- Take original 6 inch tail and the end of the yarn, and wrap a few times around the tassel close to the head, and make a knot. Wrap another time and pull it through the tassel so it hangs free. Trim the tails and cut the loops.


Comments
Post a Comment